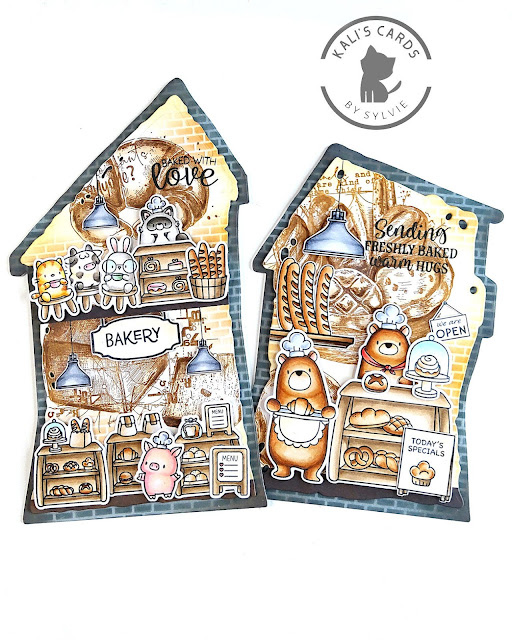
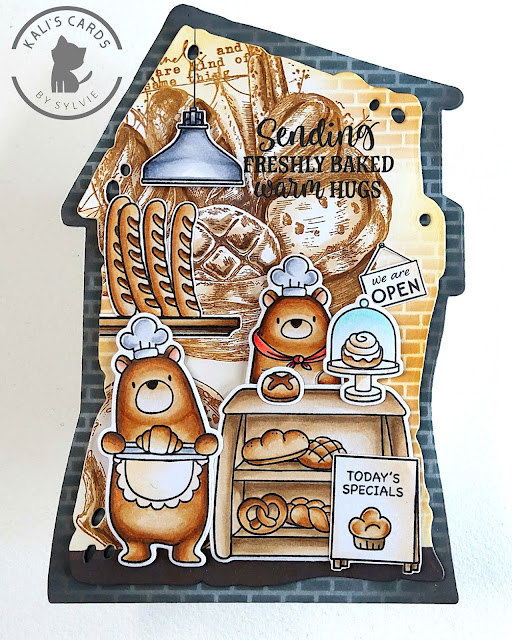
I have more inspiration to share today with the @mamaelephant Bakery sets and some great goodies from @aallandcreate. I really love how this set turned out and I hope they'll bring you some inspiration.
Products:
Bakery bears and Little agenda bakery (Mama Elephant)
Topsy-Turvy home and Doorway dreams die sets, Sweet tooth and Baked happiness stamp sets (AALL & Create)
Sweet treats (Karen Burniston)
Cozy bear candy shop (Trinity stamps)
Treat shop add-on stamp set and Perfect bricks stencil (Honeybee stamps)
New home (WPlus9 design)
I don't mean to share a full tutorial here, but I thought I would drop a few details, especially about the backgrounds.
I stamped the images from the Mama Elephant Bakery bears and Little agenda bakery sets on white cardstock and did a little bit of masking to avoid multiple layers of die cuts. I used my favorite masking paper, Whimsy Stamps No-fuss masking sheets. I then colored all the images with Copic markers and used coordinating dies, or fussy cut montage images, such as the 4 breads.
To complete the scene, I used a Honeybee stamps set, Treat shop add-on, for the larger menu board. The title comes from the same set, but I stamped a brioche from the Mama Elephant sets. The We're open board is also from that same set. I also stamped the lamps from the New home set by WPlus9 design. For the bakery sign, I used a Trinity stamps set, Cozy bear candy shop, but masked the original content which said Sweets and then stamped the word Bakery which is also a stamp from the Treat shop add-on.
For the background, I used those wonderful die sets from AALL & Create. There are 3 different house dies, and I used 2 of them for this project: Topsy-Turvy home and Doorway dreams die sets.
I did not use the window and door details that are part of the sets. Just used the large outline and inside layer. I also die cut the large outline a second time to glue at the back and have a clean finish. And I also used that same die to create a cardbase: I folded a panel and placed the crease right below the roof base to run it though the die cutting machine.
On the inside layer, I stamped the images from the Sweet tooth and Baked happiness stamp sets with Distress oxides Vintage photo and Scorched timber. I wanted to create one of those big vintage, hence modern, backgrounds that would be typical nowadays. Also reminded me a lot of the bread paper bags some bakeries use.
I then added some shading with Copic markers E43 down to E40 and added a bit more contrast with E44. Next, I blended Distress ink Scattered straw around the images, insisting on the edges. I also darkened the edges a bit more with Vintage photo. To finish that layer, I blended Vintage photo through the Perfect bricks stencil, from Honeybee stamps, in random areas. Purpose was not to cover the entire panel, but just create some bricks here and there.
I also blended Distress oxide Scorched timber to create the floors and stamped the sentiments from a Karen Burniston set called Sweet treats. I also drew black lines with a Copic liner for the lamps.
For the greater outline, I blended Distress oxide Weathered wood around the edges and then Black soot through that Perfect bricks stencil. And to finish the panel, I blended Scorched timber in some random spots for a less clean look.
To assemble the card, I glued the additional outline at the back and then the panel onto the cardbase. I adhered the inside layer with thin foam tape and then placed each element with a mix of liquid adhesive, thin and thick foam tape to add a little dimension where needed.
#mamaelephant #aallandcreate
#cardmaking #cardmakingofinstagram #handmadecards #diecutting


Comments
Post a Comment